
BT2 Guide for Destiny Knight strives to slow-reveal the info you need so you can explore and solve the game in conjunction with your own mapping process. We choose not to use comprehensive map spoilers.
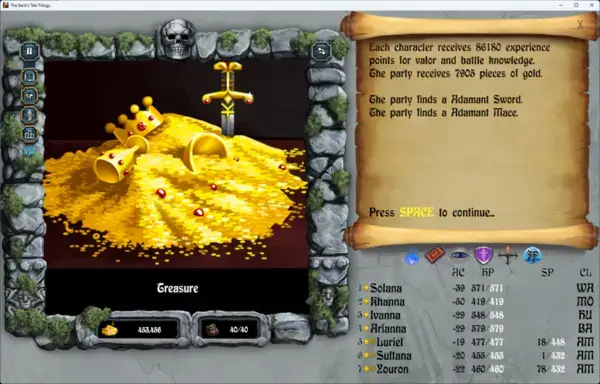
A prime XP encounter has multiple groups of 20+ enemies and no summoners.
HiGh Level Hero
Imported Parties
If you need assistance importing your party from Bard’s Tale 1, check BT2 Party Planning.
New Parties
If you would like to build a completely new party, check BT1 Party Planning.
It is suggested that you explore the Wilderness and Towns first as the enemies are more suited to low level characters. Otherwise, if you are coming from Volume 1 and ready for the first dungeon you can skip exploring the towns and wilderness until you need to go there.
Snares
Snares are contained sections of a dungeon that have a single way in, such as a teleport. There is a snare at the end of most dungeons, solving them is required and sometimes require a 6 person party. There are typically clues scattered throughout the dungeon leading up to the snare. Write down everything.. or expand Travel Notes. If the Travel Notes are not enough and you want more direction, expand Walkthrough.
Traps
Traps are everywhere. All traps are easily solved with Trap Zap but sometimes magic use is blocked, thus you need to know how to deal with them. The traps densely set in all the dungeons are the true test for any adventuring party. Multiple traps can be set at the same location such as Darkness and a Magical Spinner, a devious combination sure to confound. You must learn to deal with traps if you are to survive.
Triggered Traps
These may trigger when you step on the tile and if they are triggered, they do not rearm unless you reset the floor by using Stairs or Up/Down Portals.
Triggered Trap Mitigations
Active Levitate gives a 75% chance to avoid triggering the trap. Repeated steps on tile will retest 75% each time. A failed check will trigger the trap.
Persistent Traps
These traps are always active and so it becomes necessary to have a strategy for dealing with them during your adventure.
Persistent Trap Mitigations
-- Darkness --
Problem: Dispels light spells and torches. Bardic Light will stop working while in darkness but will not dispel.
Solution: Kiel’s Magic Compass is ideal to keep track of your direction as you traverse the darkness. Sorcerer Sight will reveal traps in the darkness.
-- Smoke Screen --
Problem: Obscures vision.
Solution: Leave the area.
-- Magical Spinner --
Problem: Spinner tiles will rotate the party and randomize facing direction. Attempting to turn left, right, or to back will cause Spinner to activate again. If you don’t realize you are spinning, it will trigger eraser use when mapping.
Solution: Kiel’s Magic Compass is ideal, but without that at least Scry Site will reveal direction facing. Knowing the direction you are facing while ON a spinner tile allows you to tap right or left and then move Forward ONLY when you are facing the direction you want.
-- One-Way Door (or Wall) --
Problem: You can get stuck unable to backtrack.
Solution: Phase Door works to backtrack if the spell is not cursed. Good mapping can help next time around.
-- Hidden Teleport --
Problem: All of a sudden you are somewhere else and you have lost your bearings. You may not even notice, which is quite confusing.
Solution: Cast Scry Site immediately after being teleported and write down the tile you came from and the tile you landed on for next time. Keeping track of teleports is key to finding your way.
-- Spell Drain Aura --
Problem: Steady loss of SP.
Solution: Definitely get off the title asap!
- Hit Point Drain Aura --
Problem: Steady loss of HP.
Solution: Get off the title!
-- Silence Aura --
Problem: Ends Bard songs.
Solution: Get off the tile and restart your song. Bard’s have limited Songs until they need drink. You can carry wineskins full of liquor to replenish on adventure. Also there are various weapons that provided “unlimited bard songs”. The Bardsong is the first and drops start to appear in Catacombs Level 1.
-- Anti-Magic Aura --
Problem: You lose all your buffs and your light.
Solution: Recast the spells. Find a Spell Points Recharge point to compensate.
Progression
Slow-reveal strives to show you only what you want to see.
- Key Points: coordinates of the places you might want to visit or avoid.
- Grind Notes calling out optimal loops to grind experience.
- Travel Notes is the lore posted in the dungeons, for easy review.
- Riddle Info posts the question and the reward but not the answer.
- Walkthrough details the steps required to complete the level including Riddle Answers.
The Sage
If you find the clues and speak with the Sage, you will be led in this linier progression. If you want to save considerable coin you can skip paying the sage for clues and refer below.
click to reveal the Sage Quest Clues
The Tombs - 1000 gold
"Hidden beneath the city of Ephesus, the Tombs have been closed for centuries. Seek the entrance at the Temple of Darkness, in the city's center."

Lagoth Zanta - 1000 gold
"An evil genius is Lagoth, else he'd not have posed the threat to the Land that he has. Yet, an enemy to be respected, I think. His whereabouts are unknown, but I'd not be surprised to find him near."

Scarlet Bard - 3500 gold
"The master of songs, the Scarlet Bard. He can be found singing songs in a tavern in Ephesus. He may be able to teach you a powerful song or two... for a price"

Kazdek - 5000 gold
"Ah, yes, Kazdek. The immortal one, as he is called, he is in fact a living statue. Seek him between Thessalonica and Colosse, with the word of his name."

Fanskar - 5500 gold
"Fanskar is a deadly warrior-mage who tried once to claim the title of Destiny Knight and failed. His castle is a well-guarded fortress, located south-west of Colosse."

Dargoth - 10000 gold
"Dargoth is a creature more animal than man, whose tower is hidden in the city of Philippi. Take care, friends, for he is death itself."

Saradon - 10000 gold
"A powerful mage who resides in Phillipi. He is alwasy sticking his nose into things he shouldn't.."

Maze of Dread - 48000 gold
"The Maze is said to be the home of the Graphnar Fist, a group of elite mercenaries who kill for both gold and pleasure. The Maze itself exists from ancient times. Seek it in Thessalonica."

Oscon - 120000 gold
"In the city of Corinth is the Fortress of the mage Oscon, whose strength is legendary and whose skill surpasses even Mangar's. Only an item of Kazdek will gain you entrance."

Grey Crypt - 125000 gold
"Take care, my friends. None has left the Grey Crypt alive. Know you, however, that no magical spells will work therein."

Destiny Stone - 230000 gold
"A rock it is, in fact, yet much more. Ponder this, my friends: Never find and never fool, the last one drinks the poison pool, the first one reads the ancient tome, the third one breaks the double dome."
click to reveal the Sage Miscellaneous Clues
Ag's Arrows
"Ag's arrows do 24 to 96 in damage and have a range of 90 feet."

Ali's Carpet
"Ali's Carpet will leave you feeling like you are levitation forever. You will get good use out of this."

Angra's Eye
"The Eye does Batchspells, as needed."

Aram's Knife
"Aram''s Knife? Oh yes. 128-512 points of damage, thrown at any range. Not too shabby."

Bardsword
"I have seen very few of these, but when I have, the bard who wielded it would never lose their voice... Strange... those bards"

Breathring
"That ring protects the wearer from breath attacks. Most useful!"

Brothers Figurine
"This figurine contains the essence of the Kringle Brothers. When shattered multiple brothers appear to fight alongside you. Enough to fill your party. They swing for 64-256 damage. They have a deadly breath and aren't afraid to use it."

Bulldozer Figurine
"This figurine contains the essence of a Bulldozer. When shattered it will release the essence and form the mighty warrior himself. He swings for 16-64 damage."

Dayblade
"The DayBlade deals 3-33 damage and is known for its ability to, in a lesser capacity, reveal the way."

Death Stars
"A ninja weapon, they do 16-64 damage and have a range of 60 feet."

Dork Ring
"A very insightful ring. Use it for inner wisdom."

Dragon Figurine
"This figurine contains the essence of a Blast Dragon. When shattered a Blast Dragon appears with a puff of smoke. It breathes on its foes and they don't often survive more than a single Blow. It swings for 18-72 damage."

Drums of Death
"The Drums of Death cast a Deathstrike spell on an opponent."

Elf Boots
"Ah, that one makes you lucky at avoiding bad spells, thrown weapons, and dragon breath."

Giant Figurine
"This figurine contains the essence of a Storm Giant. When shattered, cracks of thunder reveal a Storm Giant with your party. He slams for 31-124 damage."

Herb Figurine
"This figurine contains the essence of Herb. When shttered Herb comes to fight. Herb has the knowledge to cast: Storal's Soul Whip, and summon more herbs! He swings mightily for 32-128 damage."

Kato's Bracer
"An ingenious device! If given to a monster ally, he is not likely to turn on you."

Luckshield
"Ah, that one makes you lucky at avoiding bad spells, thrown weapons, and dragon breath."

Mage Staff
"The Mage Staff regenerates spell points and boosts the AC by 2."

Master Mage Figurine
"This figurine contains the essence of a Master Mage. When shattered a destrutive Master Mage will fight alongside you. They have the knowledge to cast: Prime Summoning, Oscon's Haltfoe, Fanskar's Night Lance and Mangar's Mallet."

Mithril Arrows
"Mithril arrows do 6-24 points of damage and have a range of 50 feet."

Nospin Ring
"The Nospin...oh yes. It protects against spinning."

Ogre Figurine
"This figurine contains the essence of an Ogre. When shattered the gruesome ogre will fight beside you. It swings multiple times for 4-16 damage."

Ring of Return
"That ring does a Safety Spell when you use it. Careful of that!"

Slayer Figurine
"This figurine contains the essence of a Slayer. When shattered an enourmous slayer will stand beside you. He swings for 31-124 damage. His swing can often kill instantly."

Song Axe
"The Song Axe is a wonderous item which always returns to the thrower, and does 64-256 hits at a range of 80 feet."

Sorcererstaff
"The SorcerStaff can destroy illusions in battle and stops more from being summoned. It can also identify those pesky dopplegangers."

Speedboots
"Those boots aid you in running from fights. Not a manly item..."

Sword of Zar
"The Sword is rarely spoken of, but it is said to be throwable, up to 80 feet for 96-384 hits."

Thief Dagger
"A thief with that has an increased chance of hiding in shadows."

Thor's Hammer
"Thor''s Hammer does 32 to 128 hits at a range of 70 feet, and it always returns."

Trick Brick
"That one makes a Wizardwall appear."

Troll Ring
"I almost forgot this existed. The Troll Ring will leave its wearer feeling healthier and healthier over time"

Wizhelm
"Ah, that one casts a Wizard War when you use it."

Zen Arrows
"Zen Arrows...oh yes. They do 40-160 in damage, to a range of 70 feet."
click to reveal the Tavern Clues
Seek knowledge from the Sage.
Bribe the dealer to keep him from cheating.
The Sage charges 500 in gold for information on magical items.
Seek the Master Key to pass the gates
The crypt lies in the wilderness.
The Dreamspell can be leanred from the rock.
Every city has one dungeon within it.
Tangramayne
You can skip mapping the town and exploring all the buildings unless you are starting a new party and need the XP and Loot. This is the town you start in.
click to reveal Key Points:
N8  E2	The Adventurers Guild
N6  E2	Garth's Shoppe
N4  E11	The Review Board
N9  E9	Roscoe's Energy Emporium
N8  E15	Entrance to Dark Domain
N11 E6	Bank
Dark Domain
This is the dungeon located in Tangramayne and you will learn of a Princess that needs a rescue. In fact, you will need to escort the princess out of the dungeon so save a spot for her in your party. You will also need to have a Bard in your party so plan accordingly.
Dark Domain – Level 1
Objective: Map the Level and find the Stairs down to Level 2
Key Points:
N0  E0	Stairs Up (out)
N21 E14 Stairs Down
Travel Notes:
N2  E0  Turn back, adventurers - you are not the first and won't be the last to attempt to save the Princess!
N14 E20	In areas unpassable, seek entrance by Phase Door to learn the secret of the double doors...
N21 E12	Below you now, thrice count the floors. Play some light for the double doors.
N12 E0  The door here looks as if something was trying to get out.
N11 E7  In the room beyond the dark. Lies the bite behind the bark. To avoid a gruesome fate. Line your arrow true and straight.
N8  E9  The blood-stained wall shows that many battles have been fought here.
N3  E21 The Princess lives...
N0  E21 Beware the creature that lives in the middle of darkness...
Walkthrough:
Door in Darkness to North at N17 E14
Stairs Down at N21 E14
Dark Domain – Level 2
Objective: Map the Level, find a Winged Creature and a Portal to Level 3
Key Points:
N21 E14	Stairs Up
N21 E21 Portal Down
N5  E12	A Winged Creature
Travel Notes:
N21 E3  Mangar was here...
N4  E0	SAMEN NGHOINT
N13 E0	Ask the wise one of The Tombs
N4  E21	Monster Reformatory
N8  E8	One level down.  Map wall and door.  Look toward the corners.  And read the four...
Walkthrough:
Enlist A Winged Creature a N5 E12
Down to Level 3 at N21 E21
Dark Domain – Level 3
Objective: Map the Level and solve two Riddles before finding the Stairs Down to Level 4.
Key Points:
N21 E21 Portal Up
N4  E1	Spell Point Regeneration
N18 E0 	Stairs Down
Riddle Info:
N3  E14	Look at the spells of the Sorcerous kind; Who's the Master of the Mind?
	Answer: ???
	Reward: Reveals a door at N18 E2
N18 E1	Speak the work to pass by.
	Answer: Pass
	Reward: Allow access, Stairs Up
Travel Notes:
N3  E21	a tombstone marked Hotwind
N10 E16	Seek the four cornered letters
N17 E16	The winged one can traverse the gap
Walkthrough:
Door to North at N3 E9
Answer "Manger" at N3 E14
   to Reveal a door at N18 E2
Answer "Pass" at N18 E1
Up to Level 4 at N18 E0
Dark Domain – Level 4
Objective: Map the Level and find the Princess. Escort the Princess to the surface.
Key Points:
N18 E0	Stairs Up
N9  E10	Spell Point Regeneration
N21 E10 The Dark Lord
N21 E11 The Princess
Walkthrough
Must have the Winged One in your party
Must have a Bard in your party
Teleport from N10 E5 -TO- N20 E16
Darkness: W3S2WS9W
Spell Point Recharge is here
Door to East at N9 E11
Darkness: N3E7N5E2N6
Door to North at N6 E9
Walk North until the Winged One acts
North through Double Doors N14 E9
Bard plays Seekers Ballad
North through Double Doors N19 E9
Defeat Dark Lord at N21 E10
Let the Princess join your party
Teleport from N21 E12 -TO- N20 E2
Get back to town for XP reward
The Wilderness
Objective: The wilderness is how you get from town to town. The enemies running wild in the wilderness are not worth your time unless you are a newbie party. Map the wilderness to find 6 towns and various other landmarks that you need to find.
Key Points:
N0  E0	A Wise Sage
N23 E4	Tangramayne Town
N6  E4	Corinth Town
N7  E24	Thessalonica Town
N15 E15 Philippi Town
N32 E23	Colosse Town
N40 E15 Ephesus Town
N27 E17 Fanskar's Castle
N31 E8	Ancient Crypt
N2  E9	Temple of Narn
N45 E29	Temple of Narn
N19 E25 Stone Man Lives Here
N45 E28 Saradon's Last Stand
Ephesus
Objective: You can skip mapping the town and exploring all the buildings unless you are starting a new party and need the XP and Loot.
Key Points:
N14 E8	The Adventurers Guild
N10 E4	Garth's Shoppe
N5  E8	Roscoe's Energy Emporium
N12 E11	The Review Board
N14 E6	Bank
N7  E8	Temple of Darkness
The Tombs
This is the dungeon located in Ephesus. You will find your first Snare, the Snare of Death, and with it an opportunity to find Wand Segment 1. You will once again need to come with a spot open in your party. I suggest you bring along 30,000 gold to purchase a Master Key, as this will nullify Spinner tiles and open Iron Gates.
The Tombs – Level 1
Objective: Map the Level and find the Teleporter to Level 2. There are important clues on this floor.
Key Points:
N0  E0	Stairs Up (out)
N20 E19 Teleport to Level 2
Travel Notes:
N12 E6  These tombs are a trap for the unwary. Take care you do not perish as a result of your carelessness...
N1  E3	If the spell of dreams you seek, five magic words you must speak.
N4  E13	The first Snare lies on the third level of the tombs.
N5  E21 The Snare of Death right spins in whole as the fire-ones feast on the dead man's soul.  Yet savage words can cut the rock and feathers split the headsman's block.
Walkthrough:
The Tombs: Ephesus N7 E8

Once inside,
Phase Door to West from N21 E21
 (which is 2 steps from Stairs)
Door to South at N21 E19
You are on Level 2
The Tombs – Level 2
Objective: Map the Level, buy a Master Key, and find Stairs to Level 3
Key Points:
N21 E0  Portal Up
N16 E10	Stairs Down
N10 E8	Keymaster
N6  E8	The Dead King
Travel Notes:
N1  E17	The great T had, at the end of things, to beg, with a kind word.
N1  E14 He was told to burn, and in that paradox know a multitude of solutions.
N1  E5	The great one knew success at all points.  Defeat was never etched on his destiny.
N1  E2	Trachaem's task was always reversed.  This is the paradox.
N21 E20	The strange mage wants two words: What Tr. did, in answer to the paradox, and what word he said at the end of things.
Walkthrough:
Arrive at N20 E19
PHDO North from N21 E0 -to- N0 E0
Visit Keymaster at N10 E8
Buy Master Key for 30,000g
Down to Level 3 at N16 E10
The Tombs – Level 3
Objective: Map the Level, Solve Snare 1, and collect Wand Segment 1
Key Points:
N16 E10	Stairs Up
N4  E21	Teleport to Start Snare
Travel Notes:
N16 E21 The staff of Old one lost, once sold. Name it to he of purest gold.
Riddle Info:
N0  E13	The Name of it is the staff of:
	Answer: ???
	Reward: Go to the Sage and ask him of FANSKAR
Walkthrough:
Riddle Answer at N0 E13 is "Old"
Hidden Door at N14 E15
Teleport from N4 E21 -TO- N10 E3
(Snare Begins)
Old Man Joins Party at N11 E10
Old Man in Position 1
Everyone Drink to Poison at N9 E12
Defeat Toxic Giant at N7 E10
Equip the Torch! on Old Man
Back to N10 E3 to Complete Snare
Find the Wand Segment 1 at N10 E8
Fanskar’s Castle
Objective: Map the Level, Solve Snare 2, collect Wand Segment 2, and find the first Dreamspell word.
Key Points:
N0  E0	Stairs Down (out)
N17 E14	Spell Point Regeneration
N21 E21 Teleport to Start Snare
Travel Notes:
N1  E0  Your light illuminates the dingy walls of Fanskar's Castle. You h ear voices in the distance.
N20 E21	To the worthy I reveal, a dream to mend, a dream to HEAL
N6  E21	Ask the Wise of DARGOTH!
N11 E6	Far right and left is hazardous, when time runs short, yet in the far corners is knowledge.
N2  E12	Ponder this: The white shall lie, and in this knowledge reflects your only answer.
N5  E1  Guards' Quarters - women please wait in the hall.
Walkthrough:
In order to learn the Dreamspell near the end of the game you will need to actually read all 5 Dreamspell word notes in game--just knowing the words is not enough.

Door to North at N7 E0
Darkness: NE2N5E2N
Teleport from N17 E4 -TO- N17 E7
Door to East at N16 E8
Read the Dreamspell word at N20 E21
Defeat Fanskar at N21 E20
Teleport from N21 E21 -TO- N9 E11
(Snare Begins)
Teleport at N10 E13 -TO- N5 E13
Collect Wand Segment 2 at N5 E10
Philippi
Objective: You can skip mapping the town and exploring all the buildings unless you are starting a new party and need the XP and Loot.
Key Points:
N3  E7	The Adventurer's Guild
N3  E9	Garth's Shoppe
N6  E13	Roscoe's Energy Emporium
N8  E9	The Review Board
N1  E0  Bank
N2  E13	Dargoth's Tower
Dargoth’s Tower
This is the dungeon located in Philippi. You will Solve Snare 3 and collect Wand Segment 3. Level 3 has the best grind location XP and Gold in the whole game. You need a Master Key.
Dargoth’s Tower – Level 1
Objective: Map the Level and fall in love with Phase Door if you are not already. Find the Stairs Up to Level 2.
Key Points:
N0  E0	Stairs Down (out)
N18 E21	Stairs Up
Travel Notes:
N17 E15	What truly counts is rarely said; Ask the wise of the Maze of Dread.
N11 E14 This room is unfair, But do not dispair, We have cleared a pair, Because we care.
N8  E12	This room is unfair, Do not go in there, But if you should dare, Scry with care.
N1  E3	Frequency is the ultimate key.
N11 E6  The ground is slippery here.
N7  E10	Seek the Zen Master.
Riddle Info:
N13 E16	It is better to Burn Out or Fade Away?
	Option: Fade Away will lock you in the room
	Option: Burn will spawn a Burner encounter and door will remain 2-way
Walkthrough:
Hidden Door to South at N8 E16
Teleport from N4 E12 -TO- N17 E21
Up to Level 2 at N18 E21
Dargoth’s Tower – Level 2
Objective: Map the Level. Defeat 7 Statues. Find Stairs up to Level 3.
Key Points:
N18 E21	Stairs Down in the Darkness
N20 E13	Stairs Up
N13 E12 Battletest
Travel Notes:
N4  E19	Keep the faith.
N16 E20 You're heading the wrong way!
N9  E2  Where are you going?
N19 E4	The Sword of Zar can only be drawn by one who has faced the Battletest.
N13 E9	The Death Snare is not on the first three levels of the tower.
N14 E17	Cryptic origins are typified in the unnatural scheme.
N15  E2	In darkest calm he stalks the men.  Who seek the wand and read the ten.  His cry is called but none knows when.
Walkthrough:
Door to East in Darkness at N12 E3
Defeat 7 Statues at N13 E12
Teleport from N5 E16 -TO- N1 E14
Teleport from N1 E7 -TO- N18 E7
Up to Level 3 at N20 E13
Dargoth’s Tower – Level 3
Objective: Map the Level. Find the second Dreamspell word. Grind up a bunch of levels!
Prime Grind Notes:
This is the very best XP Grind spot in Volume 2.  It has all the criteria covered:
- Encounters with large stacks of creatures
- Proximity to a way to Reset
- Proximity to a way to restore Spell Points
This is gravy.. but you still want to choose your battles so that your efforts are efficient. You don't want to waste a bunch of time in encounters that have poor rewards. The ideal encounter has 20+ Drachs and/or 20+ Axeman and/or 20+ Bonzai. The more the better. The strategy is simple. All 3 of your Spell casters have 20 DEX and Rimefang. Spam that spell! Helps if you have Conjurer Staff for half spell cost. Helps if you have Speedboots so that Run works when you want it to. Just to get an idea, a good encounter will net over 85,000 XP each for a 7 hero party.. and about 8k gold.
The Stairs to Reset the Level encounters is at N20 E13. The Spell Point Recharge tiles are all over the place south of the Stairs. The 17 Encounter nodes are just south of the Spell Point Recharge are in little rooms and a long hallway. Trigger all 17 encounters and Run from encounters without a bunch of Drachs, Axemen, or Bonzai. You can Apport Arcane back to this floor if you need to go Sell Loot or Roscoe Recharge.

It is really fast grind spot with this tactic.. hold Space Bar to expedite the combat messages.  You can also come back here later after you pick up the Dreamspell.. then it is even easier and faster!
Key Points:
N20 E13 Stairs Down
N9  E2	Portal Up
Travel Notes:
N8  E13	Illusions cunning and corrupt, a dream can shatter and DISRUPT.
N1  E8	For as a snare shall it come on all them that dwell on the face of the whole earth.
N8  E15	The law of the wise is a fountain of life, to depart from the sanres of death.
N12 E20	The first says dwell, the second hell the third of wisdom it well tell.
N14 E5	In the lands within, and the traps between, what was secret once - now cannot be seen!
N19 E2	From the first take the last, fifth from the second, and eighth frmo the third.
Riddle Info:
N6  E2	Speak the three, in sequence:
        Answer: ???
	Reward: Access to Level 4
Walkthrough:
Apport Arcane to N8 E13
Read Dreamspell word at N8 E13
Teleport from N5 E17 to N10 E17
Hidden Door to East at N13 E16
Teleport from N13 E17 to N13 E11
North goes back to SP Recharge
Grind as many levels as you want
Door to North at N5 E4
Hidden Door to West at N6 E3
Answer the Riddle at N6 E2
   Answer1: Earth
   Answer2: Compassed
   Answer3: Fountain
Up Level 4 at N9 E2
Dargoth’s Tower – Level 4
Objective: Map the Level and find the stairs up to Level 5.
Key Points:
N9  E2	Portal Down
N19 E18 Stairs Up in the Darknesss
N7  E10	Door in the Darkness
Travel Notes:
N15 E9	For three you see, cannot be free
N12 E4	And number two is never true
N8  E0	And this, the first, it quencheth thirst
N9  E2	Not everything has two sides, Take care, friends
Walkthrough:
If you try to explore every square you will be teleported to bottom half of map and need to work you way back up. Instead, try to get through the maze area and into one of 6 doorways. Then find the staircase in the northern area of darkness.

From the Portal at N9 E2
Follow hallway to West and North
Use the gap at N10 E10, then West
Make it to any 1 of the 6 Doors:
N21 E9,
N19 E9,
N17 E9,
N15 E9,
N13 E9
Once into the northern Darkness
Stairs Up in the Darkness at N7 E10
Dargoth’s Tower – Level 5
Objective: Map the Level. Solve Snare 3 and collect Wand Segment 3
Key Points:
N19 E18	Stairs Down in the Darkness
N17 E20	Door in the Darkness
Travel Notes:
N14 E0	Six we know will try to crow.
N16 E12 For seven and eight reverse tiny and late.
N15 E21 Number 9 likes his favorite wine.
N3  E11	The last, you see, is number ten; they cannot be called manly men.
N9  E11	We can agree our goals are accordant.  An alliance between our forces would be advantageous to both our desires.  I will abide in the south while I await your decision.  Lagoth Zanta
Riddle Info:
N12 E9	Speak the ten in sequence and find the Death Snare:
	Answer1: ???
	Answer2: ???
	Answer3: ???
	Answer4: ???
	Answer5: ???
	Answer6: ???
	Answer7: ???
	Answer8: ???
	Answer9: ???
       	Answer10: ???
	Reward: Access to Death Snare
Walkthrough:
Door South in the Darkness at N17 E20
West to E14, then North to N21
All the way West into the box maze
Answer the Riddle at N12 E9
	Answer1: Water
	Answer2: Lie
	Answer3: Slave
	Answer4: Gold
	Answer5: Hate
	Answer6: Rooster
	Answer7: Large
	Answer8: Early
	Answer9: Bard
       	Answer10: Women
(Snare Begins)
You are at N5 E20
East from N6 E21 -TO- N6 E6, 1st msg
"Secret is hidden in the Dreamspell"
then go back to N6 E21
East from N6 E21 -TO- N6 E6, 2nd msg
"The Snare of Death can be beaten
 by the mage."
then go back to N6 E21
East from N6 E21 -TO- N6 E6, 3rd msg
"Turn right at the joke, then right,
then forward, then left twice,
ahead twice, right, then left"
The 3rd msg is the clue you need
Head East from N3 E21 -TO- N3 E0 to see
message "A voice is heard laughing"
This is the "joke", now follow the clue
Note: the clue is hard to follow for
real, but just make your way to N0 E1
Answer 'Havok'
Head North and West to N5 E18 for clue
"Look at the Wall" and a door appears
Enter the door for Wand Segment 3
into the wilderness…
Objective: Before you reach Thessalonica there are a few places to explore. Explore all the Temples and Huts in the wilderness looking for clues.
Walkthrough:
Explore the Temple at N45 E29
Inspect Saradon's Corpse
Wardstone received

Explore the Hut at N19 E25
Ask about "Kazdek"
Item of Kazdek received
Thessalonica
Objective: You can skip mapping the town and exploring all the buildings unless you are starting a new party and need the XP and Loot.
Key Points:
N6  E2	Roscoe's Energy Emporium
N8  E10 The Adventurers Guild
N4  E5	Garth's Shoppe
N3  E4	The Review Board
N14 E11 Maze of Dread
N3  E8 	Bank
N14 E13 Saradon's Home - Optional
Riddle Info:
N14 E11	Where steel is bright, and blood runs read.  Walk down the stairs to the Maze of?
	Answer: ???
	Reward: Access to Maze of Dread
Walkthrough:
Answer "Dread" to enter the Maze of Dread

Optionally, you can enter Saradon's home and find a Harmonic Staff.  You must have the Wardstone to get in.
Maze of Dread
This dungeon is located in Thessalonica. You will Solve Snare 4 and collect Wand Segment 4.
Maze of Dread – Level 1
Objective: Map the Level and look for clues. Find Stairs, 2 Portals, and an Elevator which all go up to Level 2.
Key Points:
N2  E12	Spell Point Recharge
N0  E0	Stairs Up (out)
N21 E21	Stairs Down
N16 E3	Portal Down
N10 E21	Portal Down
N1  E21	Elevator 1-3
Travel Notes:
N7  E18	As black as coalfoot's longest track.
N8  E16	Try green, the one who lies unseen.
N5  N15	As yellow as the great one's bellow.
N15 E10	Yes brown, as was the mighty crown.
N21 E6	Twas blue, the one that never knew.
N1  E12	Not white, while you can stand and fight.
N4  E0	The dank corridors of this sinister maze have been tunneled from raw earth and lined with crumbling flagstones. It doesn't look like a safe place.
Walkthrough:
Once you are done collecting clues or reading the Travel Notes use Elevator up to Level 2 at N1 E21
Maze of Dread – level 2
Objective: Map the Level. Obtain the Sword of Zar. Collect another Dreamspell Word.
Key Points:
N21 E21	Stairs Up
N16 E3  Portal Up
N10 E21	Portal Up
N12 E1	Teleport -TO- N8 E5
Travel Notes:
N9  E10	Though enemies wear plate and sallet, a dream can crush them like a MALLET.
N3  E21	Ask him of Oscon, he who knows many things.
N4  E14	Time is short on the Snare... take care!
N5  E12	Seek the Zen Master, friends!
N12 E12	The thirst brings an even score of jaunts.
N21 E0	The Graphnar Lord is magic-proof.
N4  E3	The Riddler seeks a word, but he'll only understand it backwards.
N14 E11	The Sword of Zar lies below.
N14 E9	The Riddler's clue lie on the entry level.
Riddle Notes:
N15 E10 Blue, red, green, brown, black, white, yellow; Colors cast in the artist's pot, name the false while canst be caught...
	Answer: ???
	Reward: Sword of Zar
Walkthrough:
Answer "Der" at N15 E10
 Collect the Sword of Zar
 (Battletest req, Dargoth's Tower L2)
Read the Dreamspell word at N9 E10
Up to Level 3 via Elevator N1 E21
Maze of Dread – Level 3
Objective: Map the Level. Solve Snare 4 and obtain Wand Segment 4.
Key Points:
N1  E21 Elevator Up
N8  E4	Graphnar Lord (optional))
N8  E17	Teleport into Snare
Walkthrough:
Door to North at N4 E11
Door to North in the Darkness at N6 E1
Left is SP Drainers and Graphnar
Right to the Snare, and prepare as this
snare is all Anti-Magic Aura.  Heal up.
Bardic light works through most of it.
Teleport from N8 E17 to enter the snare
(Snare Begins)
You are at N16 E4
Answer "Endurable" at N19 E6
--Loop Start--
Door to West at N21 E4
Follow path N21 E6 receive the Vial
Return to N21 E4
Teleport from N17 E7 -TO- N19 E6 and
  turn in Vial and
  enter the Passcode 'Endurable'
--Loop--Turn in 5 Vials this way
On the 5th time, a door will appear
Door to East from N19 E6
Collect Wand Segment 4
Corinth
Objective: You can skip mapping the town and exploring all the buildings unless you are starting a new party and need the XP and Loot.
Key Points:
N2  E3	The Adventurer's Guild
N4  E0	Roscoe's Energy Emporium
N12 E14	Garth's Shoppe
N12 E2	The Review Board
N14 E5	Bank
N13 E8	Oscon's Fort
Oscon’s Fort
This is the dungeon located in Corinth. You will Solve Snare 5 and collect Wand Segment 5. To solve the snare, you will need 3 open party slots. This dungeon has a fun mechanic called Tripwire. Step swiftly.
Oscon’s Fort – Level 1
Objective: Map the level and answer the Riddle to reach the next floor.
Key Points:
N0  E0	Stairs Down (out)
N12 E10	Stairs Up in the Darkness
N9  E17 Door in the Darkness
N11 E3 	Door in the Darkness
Travel Notes:
N18 E11	In caverns deep near pits of fire, The Argon creep and do conspire.
N21 E12	Of battles fought in the land of Krill, Sing bards without a ghostly will.
N5  E12	Sword of silence axe of hate, Death arrow's path is always straight
Riddle Info:
N7  E3	Pits of ...
	Answer: ???
	Reward: Stairs Up appear.
Walkthrough:
Make your way to N11 E11
Hidden door to North at N11 E11
Teleport from N16 E15 -TO- N2 E16
Teleport from N0  E14 -TO- N0 E16
Door to North at N0 E17
Darkness: N3WNW2NW5S2W5N
  which is N7 E3
Answer Riddle "Fire"
Door to South back into the Darkness
Teleport from N8 E1 -TO- N18 E1
Door to East in Darkness at N13 E4
Door to North at N15 E4
Darkness: E3S4E3
Down to Level 2 in Darkness at N12 E10
Oscon’s Fort – Level 2
Objective: Map the level and answer the Riddle to reach the next floor.
Key Points:
N12 E10	Stairs Down
N21 E0	Stairs Up in Darkness
Travel Notes:
N13 E6	D
N7  E6	E
N1  E6	R
N13 E21	V
N7  E21	A
N1  E21	K
N8  E16 Bond them into the Last one's name!
N0  E14 Only 4 to solve the Snare above
N16 E19	Sword or mace or axe or pike, dream a dream to gain a STRIKE.
N20 E6	To leave and rise, then seek 6 lies: First the 3 west then the 3 easy, from north to south - to be released!
Riddle Info:
N20 E21	Give me the name of the last Destroyer.
	Answer: ???
	Reward: Stairs Up appear
Walkthrough:
Door to North at N4 E13
Darkness: EN7
  which is: N12 E14
Answer "Dervak" at N20 E21
Return to the Darkness at N11 E14
Darkness: S2E2 Teleports
  which is: N11 E6
Teleport from N6 E6 to N0 E6
Teleport from N4 E0 to N4 E15
Teleport from N5 E15 to N17 E15
Door to East as N13 E18
Read the Dreamspell word at N16 E19
Teleport from N17 E21 to N17 E6
Teleport from N12 E0 to N6 E15
One-Way Door to South at N10 E15
Darkness: WN2W7N10W7
  which is: N21 E0
Up to Level 3 at N21 E0
Oscon’s Fort – Level 3
Objective: Map the level and answer the Riddle to reach the next floor. Ignore the inaccessible areas and move on to next floor.
Key Points:
N21 E0	Stairs Down
N14 E1  Stairs Up
Travel Notes:
N5  E8	Say the Word to ascend...
N8  E8	In Skara Brae did Mangar reside, yet his brother travelled farther yet, and now is your nemesis...
N20 E20	The Bezwark came, the axeman fell.  The key was dropped, within the well.
N11 E7	The Zen Master needs no introduction.
Riddle Info:
N12 E2	Say it to ascend:
	Answer: ???
	Reward: Stairs Up appear
Walkthrough:
Door to South at N2 E0
Hidden Door to West at N10 E21
Darkness: W19N2E
  which is: N12 E2
Answer Riddle "Still", reveals stairs
Door to West at N12 E2
Darkness: NE11N
  which is: N14 E12
Hidden Door to West at N14 E5
Hidden Door to West at N15 E3
Up to Level 4 at N14 E1
Oscon’s Fort – Level 4
Objective: Map the Level. Defeat Oscon. Defeat Snare 5. Obtain Wand Segment 5.
Key Points:
N14 E1	Stairs Down
N5  E20	Oscon
N10 E10	Teleport into Snare
Travel Notes:
N17 E10	Ask the wise of the Grey Crypt.
N0  E21	Mages Beware: Oscon allows none to glory...
N3  E20 Oscon, in the flash, baby.
N6  E18 To wrap, to cut, and even smash, I think you'll find this Snare a bash.
Walkthrough:
Door to West at N14 E21
South, then all the way to N2 E0
Door to North at N2 E0
Every 2x2 room has 1 or 2 Hidden Doors
Hidden Door to East at N3 E19
Defeat Oscon at N5 E20
Backtrack to N14 E21
North, then all the way to N18 E20
Door to South at N18 E20
Darkness: S10W6NW
  which is: N8 E14
Door to North at N9 E6
Teleport from N10 E10 to enter snare
(Snare Begins)
Answer "Rock" at N11 E11
Obtain in a ROCK character
Answer "Scissor" at N14 E14
Obtain a SCISSOR character
Answer "Paper" at N14 E8
Obtain a PAPER character
Reorganize Party ROCK (1)
then PAPER (2) then SCISSOR (3)
N17 E11 to reveal Wand Segment
N10 E11 to obtain Wand Segment 5
Grey Crypt
The Grey Crypt is in the wilderness West of Colosse. The crypt is entirely shrouded in Antimagic and you will only be able to Scry Site once inside. Fortunately, your Bard’s Seekers Ballad will light most of the way. If you Identified Wand Segment 5 you will know it casts Batchspell, try it in the Grey Crypt.
Grey Crypt – Level 1
Objective: Map the Level. Answer the Riddle to reach the next floor.
Key Points:
N0  E0	Stairs Up (out)
N18 E0	Stairs Down
Travel Notes:
N1  E1  The eerie silence of the Crypt lies all around you. This is a place which drains all magic from the air around you, and all will from your mortal forms.
N3  E20 To continue is to cut off all hope of life!
N8  E2	Ask the wise one of DESTINY STONE
N15 E14	Be not bold - it's twice foretold!
N18 E5	You sell your steel past dawn and drift, yet secret is the ancient gift to offer up a blessed lift.
N20 E15	past days of wisdom's early reign, past years of fire, wrath, and pain, a passage down you've yet to gain.
N4  E20	here this, mortals: The sphynx asks a riddle with 2 answers, one which allows release through Sword, and one which Wizely bring you closer to the Snare.
Riddle Info:
N7  E1	Two answers here I will accept: Each is a creature of the Crypt.  Name it:
	Answer1: ???
        Answer2: ???
	Reward: Stairs Down Activated
Walkthrough:
This dungeon is shrouded in Anti-Magic
Identified items that cast spells will
Bardic Light can illuminate the way
Entrance at N31 E8, answer "Grey".
Hidden Door to South at N2 E8
Door to North at N3 E20
Teleport from N5 E3 -TO- N13 E3
Door to North at N14 E11
Teleport from N15 E21 -TO- N11 E21
Hidden Door to South at N9 E4
Hidden Door to South at N8 E12
Answer "Wize One" at N7 E1
One-Way door to South at N7 E14
Teleport from N5 E3 -TO- N13 E3
Door to North at N14 E11
Down to Level 2 at N18 E0
Grey Crypt – Level 2
Objective: Map the Level. Defeat the Vampire Dragon. Solve Snare 6 and obtain Wand Segment 6.
Key Points:
N18 E0	Stairs Up
N5  E1	Vampire Dragon
N6  E0 	Teleport into Snare
Travel Notes:
N14 E14	Past the Tomb lies the true snare.
N3  E2	The Tomb of the Vampire Dragon - Adventurers Beware!!!
N21 E18	Be not bereft... first try lower left!
N10 E21	The Snare is a calculated sequence; learn it quickly, or perish!
N4  E21 The game you thrice must commit, and now i'll see you in a bit!
N11 E4	If the spell of dreams you wield, safe you'll be behind its SHIELD
N8  E11	Prepare for your death, oh mortal fools.  The sixth Snare will beat you, and few are those who have every solved its twisted pattern...
Walkthrough:
Bardic Light saves the day in here. There are a lot of Hidden Doors in here.  If you identified it, you can use Wand Segment 5 for Batchspell, to help avoid traps. (you really don't want to get Poisoned or Stoned, due to the Anti-Magic)

Hidden Door to West at N19 E21
Hidden Door to West at N19 E19
Hidden Door to South at N18 E17
Hidden Door to West at N17 E17
Hidden Door to South at N17 E16
Hidden Door to West at N12 E7
Darkness: SW3
  which is: N11 E4
Read the Dreamspell word at N11 E4
Backtrack out of Darkness
Hidden Door to West at N2 E8
Defeat Vampire Dragon at N5 E1
Teleport from N6 E0 to the snare
(Snare Begins)
Teleport from N8  E12 -TO- N0 E20
Step N0 E13 to Turn off the Spinner
Teleport from N0  E12 -TO- N8 E20
--Loop Start--
Visit the Grey Mage at N4 E21
Enter the Door to South at N4 E14
Check for "Yes, I think..." at N2 E14
Visit the Blue Mage at N4 E11
Enter the Door to the West at N6 E16
See message "Yes, I think..." at N6 E14
Visit the Grey Mage at N4 E21
Enter the Door to East at N2 E16
See message "Yes, I think..." at N2 E18
Visit the Blue Mage at N4 E11
Enter the Door to North at N4 E18
See message "Yes, I think..." at N6 E18
--Loop 3 Times and the THIRD time that you get to N6 E18 you will be awarded the Wand Segment 6 and a Teleport out to the wilderness.

Note: If you mess up the sequence you will get a "MISTAKE" message, simply start the sequence over at the Grey Mage.   If you mess up and start over repeatedly though, you may run out of time and it will be game over.  I was standing around writing a guide and oops.
Colosse
Objective: You need a max 6 person party for Destiny Stone Snare as you will pick up some help once inside.
Key Points:
N6  E11 The Review Board
N2  E5  Garth's Shoppe
N7  E9  The Adventurer's Guild
N1  E11 Roscoe's Energy Emporium
N13 E8  Bogus Shine Temple
N13 E2  Destiny Stone
Destiny Stone
You will need 1 spot open in your party to solve the final snare.
Destiny Stone – Level 1
Objective: Learn Dreamspell with all Archmages. Descend to Level 2.
Key Points:
N0  E0	Stairs Up (out)
N9  E18 Spell Point Recharge
N3  E17	Stairs Down in the Darkness
Travel Notes:
N0  E5	Only a Master Mage can do the impossible.
N4  E7	Hear the sphere, speak the truth, the plan is near though quite uncouth.
N15 E18	The Bold One cometh!
N17 E17	Seek the Narn Temple.  He who approaches the alter may restore that which is broken.
Riddles Info:
N16 E8	Ok scumbags, tell me what the plan is, or you're going nowhere.
	Answer: ???
	Reward: Teleport to N13 E8
N9  E18	The spell of dreams may here be earned.  Just speak the words in order learned.
	Answer 1: ???
	Answer 2: ???
	Answer 3: ???
	Answer 4: ???
	Answer 5: ???
	Reward: Select an Archmage to learn Dreamspell (repeatable with reset)
Walkthrough:
1234567890123456789012345678901234567890
From Stairs Map your way North
Teleport from N20 E6 -TO- N20 E10
South and West to exit the box maze
North on E8 to end then East on N21
You pass many 1-way doors to East
South on E21 to end then West on N14
Answer "Near" at N16 E8
Use Teleporter at N16 E8 -TO- N13 E8
East on N13 all the way to N13 E21
Learn Dreamspell at N9 E18
        Answer 1: SHIELD
	Answer 2: MALLET
	Answer 3: HEAL
	Answer 4: STRIKE
	Answer 5: DISRUPT
(Reset and repeat for more Archmages)
Stairs Down to Level 2 at N3 E17
Destiny Stone – level 2
Objective: Kill D’Artagnon. Descend to Level 3
Key Points:
N4 E18	Look at for Combat D'Aartagnon
N3 E18 	Teleport -TO- Level 3 @ N3 E18
Destiny Stone – Level 3
Objective: Complete the final Snare and obtain the final Wand Segment!
Key Points:
N16 E19	Teleport into Snare
N14 E15 Teleport to the Wilderness
Travel Notes:
N0 E1 The Narn Temple lies close to the sage, to the south west of Corinth.
Riddle Info:
N13 E1	Of old portent the song will read; name the hands which did the deed.
	Answer: Any Jibberish Answer Teleports -TO- N12 E9
N10 E8 	A Magic Mouth tells a rather long story...
	Answer: Zen Master
	Reward: Zen Master joins your Party (put them in Position 1)
N13 E15	The one of whom is great in fame restore to him his proper name.
	Answer: Arkast
        Reward: Access to N14 E15 and Wand Segment 7
Walkthrough:
Teleport from N16 E19 in snare
Scry, work around unhelpful teleports
North and West to Magic Mouth at N13 E1
Answer "WRONG" and  teleport to N12 E9
Darkness: SSW
  which is: N10 E8
Answer 'Zen Master', Zen Master joins
Put Zen Master in Position 1
East 5x, Teleports to N10 E14
Step N10 E16
Answer "Gale" at N12 E18
Equip The Ring on Zen Master
Door to South at N8 E18

(Description)
N7  E18 is Starting Point for each Trip
N8  E16 is End Point for each Trip
N9  E16 teleports to N4 E9
N13 E1  Magic Mouth that hears the Word
and put you in place for the next Trip
complete all 7 trips for Wand Segment 7

Trip(1): pick a notation, not both
SSS WN WWWW N EEEE NWN
↓3 ← ↑ ←4 ↑ →4 ↑ ← ↑
Word: Storm Fists

Trip(2):
SSS WWW WWW NN WNEE SSEE NWNEEN
↓3 ←6 ↑2 ← ↑ →2 ↓2 →2 ↑ ← ↑ →2 ↑
Word: Storm Fists

Trip(3):
WSESS WWWW WWWW NNNN EEESS EEENN
← ↓ → ↓2 ←8 ↑4 →3 ↓2 →3 ↑2
Word: Storm Fists

Trip(4):
WSWW NEN
← ↓ ←2 ↑ → ↑
Word: Storm Fists

Trip(5):
SSSW WWWW NEEEE NWWWW NEEEE N
↓3 ←5 ↑ →4 ↑ ←4 ↑ →3 ↑
Word: Storm Fists

Trip(6):
SSSW NNWSS WWWWN EEENN EN
↓3 ← ↑2 ← ↓2 ←4 ↑ →3 ↑2 → ↑
Word: Storm Fists

Trip(7):
SWWW WWWSS WWNNN EEEE EEN
↓ ←6 ↓2 ←2 ↑3 →6 ↑

After trip 7, teleported to N11 E16
Answer "Arkast" at N13 E15
Wand Segment7 awarded at N14 E15

BUG (observed on remaster): I failed the Snare 6 times on Trip2 step while working out how to write up these steps.. and I restored a Saved Game before the Swirling Portal at N16 E19 to try again each time.   On my 7th Attempt.. after successfully completing only Trip(1) seven times, I was teleported to N11 E16 and I was able to answer 'Arkast' and obtain Wand Segment 7. This bug worked in my favor, moving on.
The Destiny Knight
Objective: Reconstruct the Wand. Promote an Archmage to Destiny Knight. You did it!
Walkthrough:
Head to the Temple of Narn in the Wilderness at N2 E9. Approach the Alter with an Archmage having high Spell Points. Make sure you have all the Wand Segments, if a segment is equipped on someone not in your party, you will need to get that Segment into the Party.

This Archmage is the Destiny Knight!
Equip the Scepter
Restore you Magic Points!

If you want to Identify the Sceptre, you'll need a cool 700,000 gold.

If you need cash fast.. go back to Dargoths Tower - Level 3.  This is the best grind in the game as there are plentiful large stacks of creatures and Spell Point Regeneration.  Dreamspell to get there, Dreamspell to wipe out large groups, and Dreamspell to get back to town to Sell drops and recharge Spell Points.  A lot of encounters just south of Stairs you can use for reset at L3 N20 E13.  With a good encounter you will get 50k XP for 7 heroes and 8000 gold.  Remember to Hold space to expedite combat messages.  Skip the fights with low death count, math is your friend.
The Old Sage
Objective: Celebrate with the Sage!
click to reveal Walkthrough:
Prepare yourself for combat.
Head to see the Sage at N0 E0.
Combat begins with Lagoth Zanta
The Destiny Knight will not drop below 1HP. Attacks that would take them to 0 will intead Reduce Spell Points by 2. If Spell Points reach 0, game over. The Scepter has Range attack 90'.
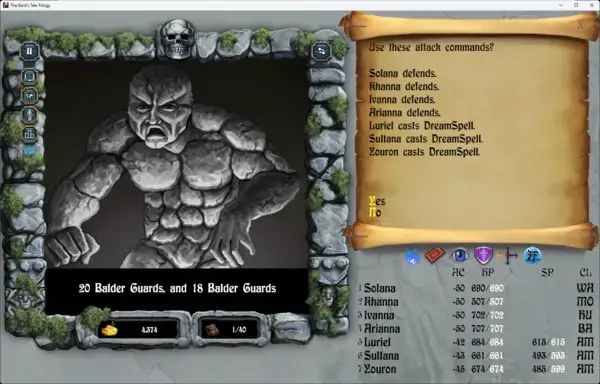
I decided to Defend with my front 4. Destiny Knight used Sceptre on Lagoth. Back two casters both dropped Dreamspell. Lagoth dropped in 2 rounds then Defend/Dreamspell till the end. My team took 0 damage, characters are roughly 35 at this point with maxed stats and spells. Dreamspell and Batchspell active in screenshot.

Adventures Guild
Nice work! Now on to Volume 3: Thief of Fate!
Attribution
How to obtain a copy of this game
GOG link – Digital PC Bundle (Remastered Trilogy) (includes games 1-3)
GOG link – Digital PC Bundle (Action RPG Version 2004) (includes Original Trilogy 1-3)